Schlieren Visualization
Air is invisible, but that doesn't mean you can't see what's going on sometimes
This is a stripped down version of Schlieren visualization, technically really just an advanced shadow, but it does reveal even small variations in the optical density of air.
Materials
- 4 inch or larger (whatever you can afford) convex mirror for a Newtonian telescope like this one
- 6 inch adjustable F clamp like this one
- Various thicknesses of books or something else to raise and lower the mirror
- 6 inch by 6 inch piece of aluminum foil
- Tape measure or meterstick
- push pin
- Bright flashlight like this one
- Mount for flashlight. (I used a ring stand and a three finger clamp, but even just setting it down works.)
- 12 in square screen (for example, foam core)
- Mount for screen (I used a bookend and a medium binder clip)
Construction
- Unwrap the mirror. Be careful to hold the mirror by the edges. It has the aluminum on the side you can touch, called being a first surface mirror. It's extremely hard to clean a first surface mirror.
- Use the clamp to hold the mirror at the bottom edge so that the clamp will support the mirror. I know I just wrote, don't touch the mirror and the clamp will touch. Yes, it will damage the silver, but only a little bit, and you'll do it in the same spot every time.
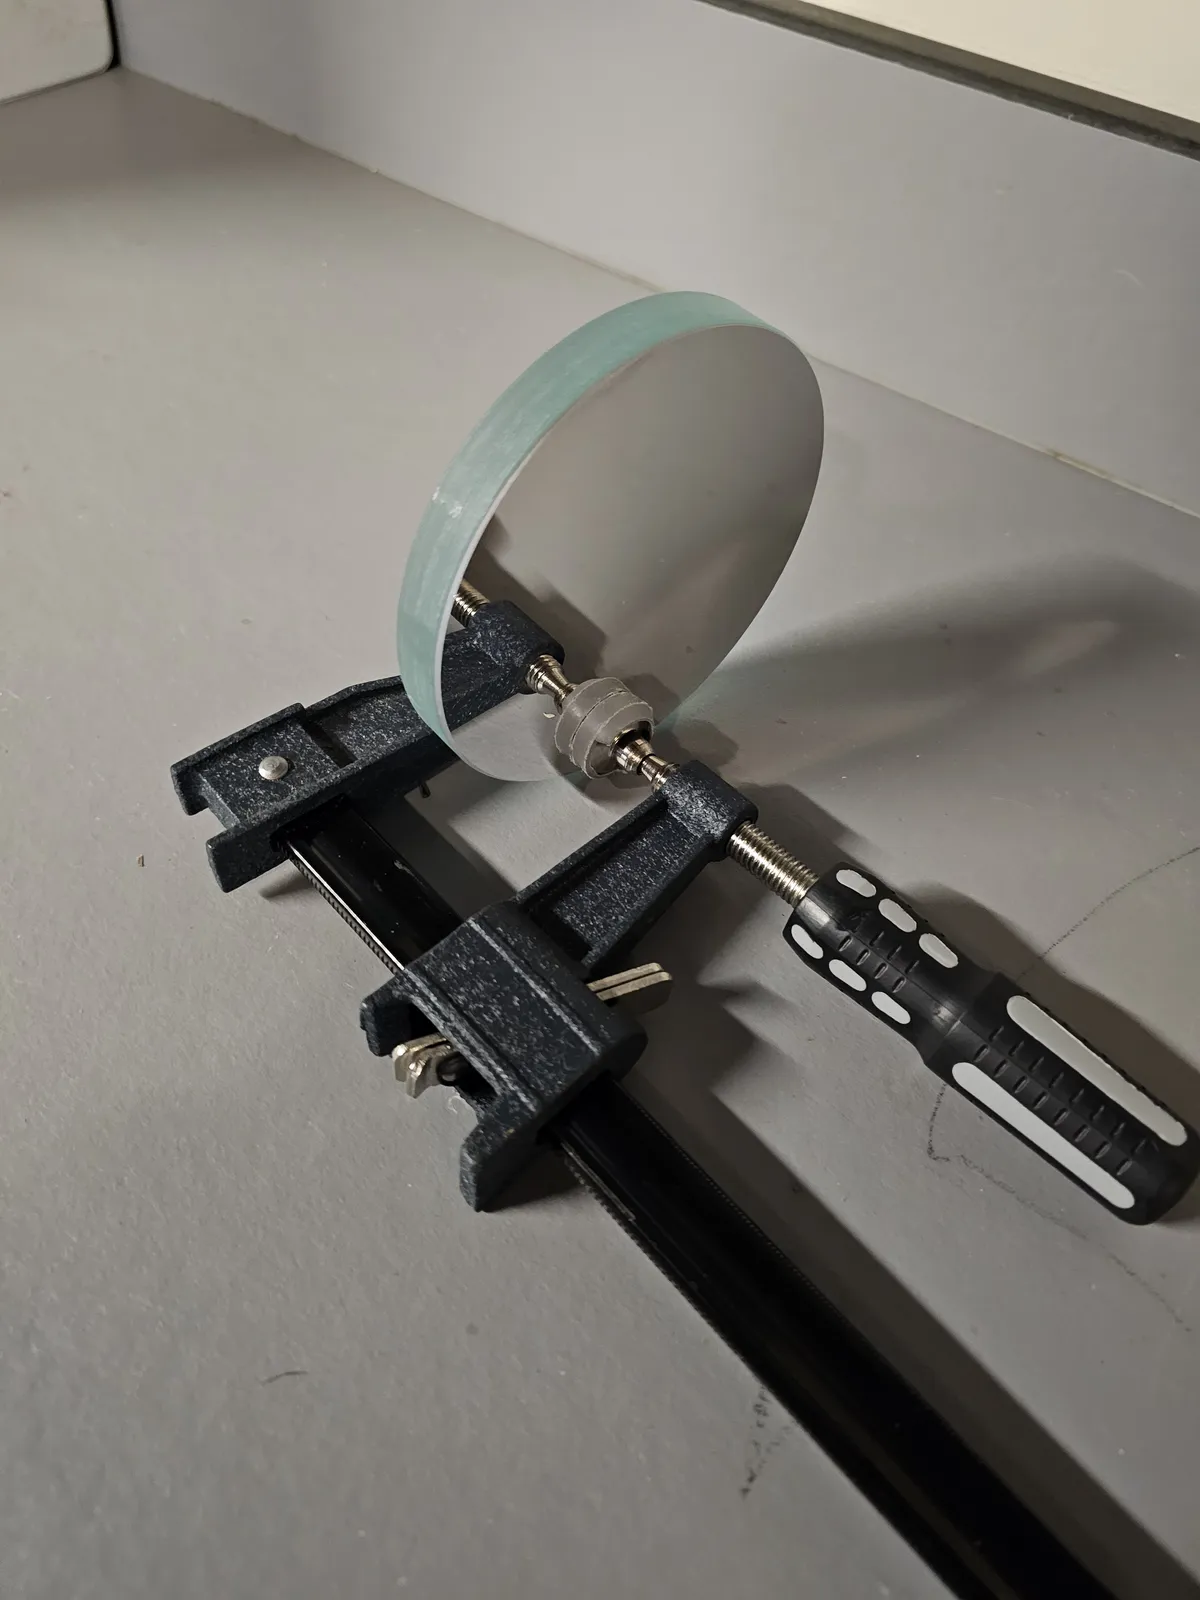
- Place a few books under the mirror to raise it a bit off the table.
- Using the pushpin, make a small hole in the aluminum foil. The smaller the hole, the sharper the image and the more subtle changes can be seen, but it will be dimmer.
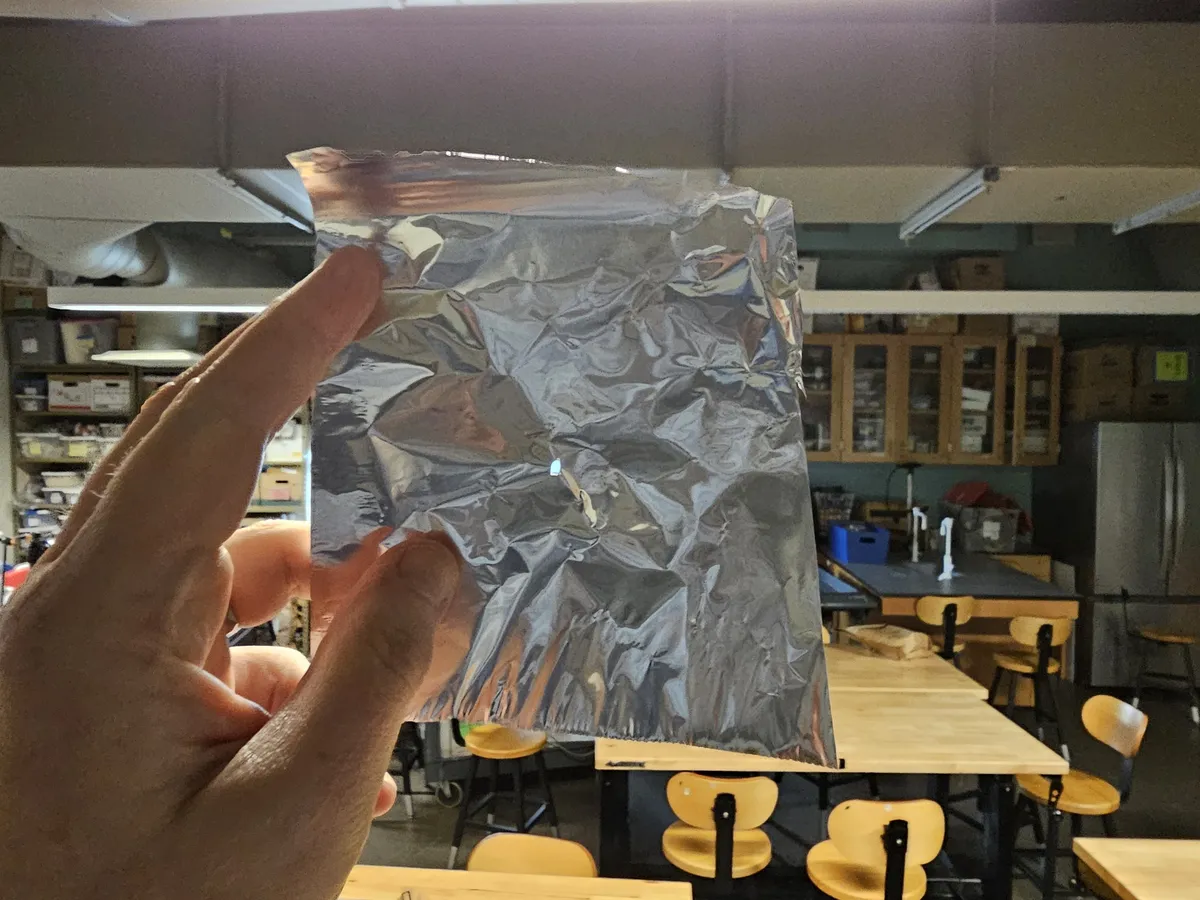
- Turn on the flashlight. Place the aluminum foil over the flashlight with the hole in the center. Crimp the foil in place.
- Place the flashlight in the holder and aim it at the mirror. Use the screen to make sure that the mirror is centered in the beam.
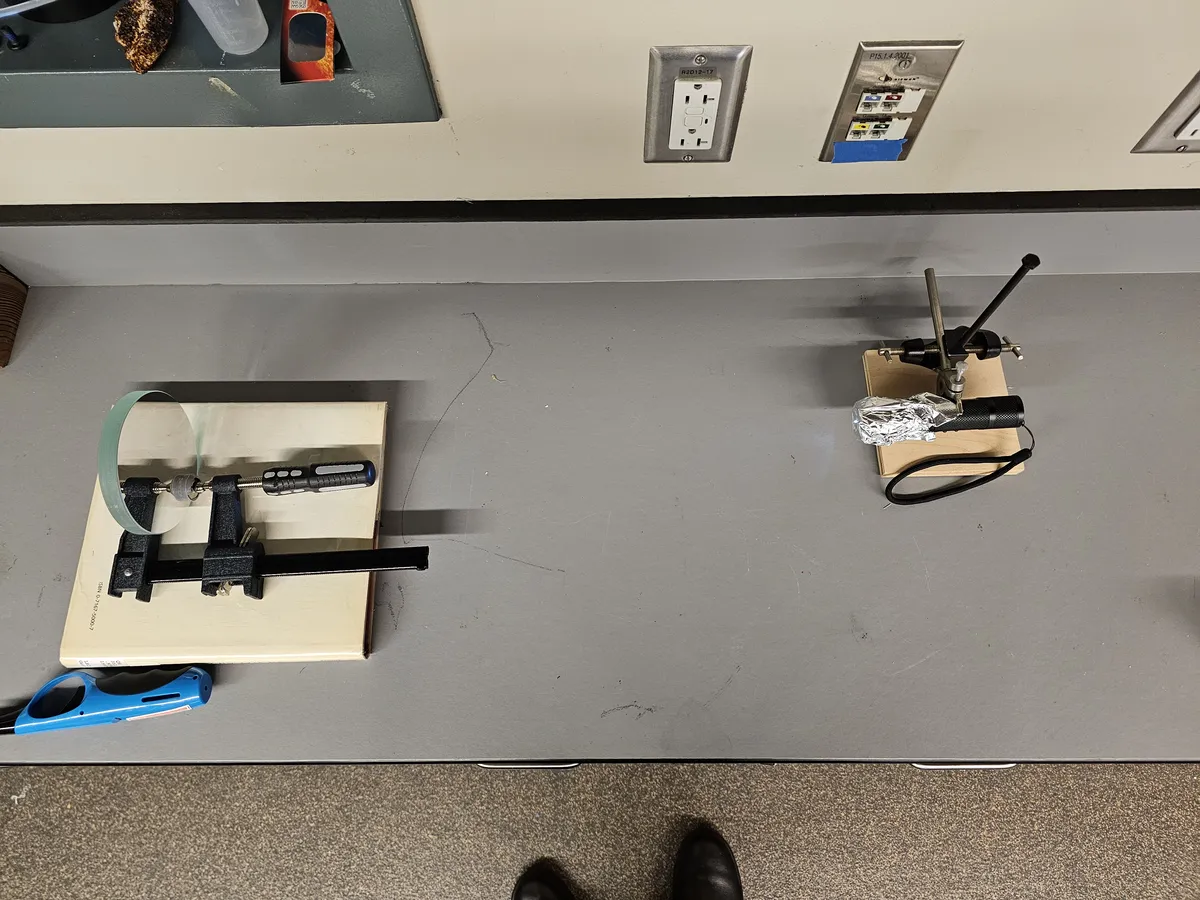
- The mirror should be at least the mirror's focal length from the lens, but more is better if you can spare the space. If your flashlight's beam is adjustable, adjust so that the beam just covers the mirror.

- The flashlight needs to be at a bit of an angle so that it's image will not be projected back on the flashlight.
- Place the screen past the flashlight. Farther away makes a bigger image but dimmer.
To Do and Notice
Try placing a lighter near the mirror. Try a some ice. Try a hairdryer.
What's Going On
A mirror that is cut from a sphere can reflect light to make an image. R is the radius of the sphere that the mirror was "cut" out of.
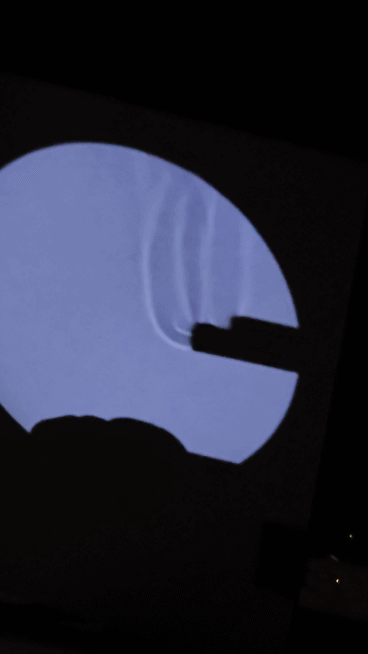
Because we put a pinhole cover over the flashlight, it is like the light is coming out of a tiny pinhole. That light spreads in all directions and bounces off the mirror.
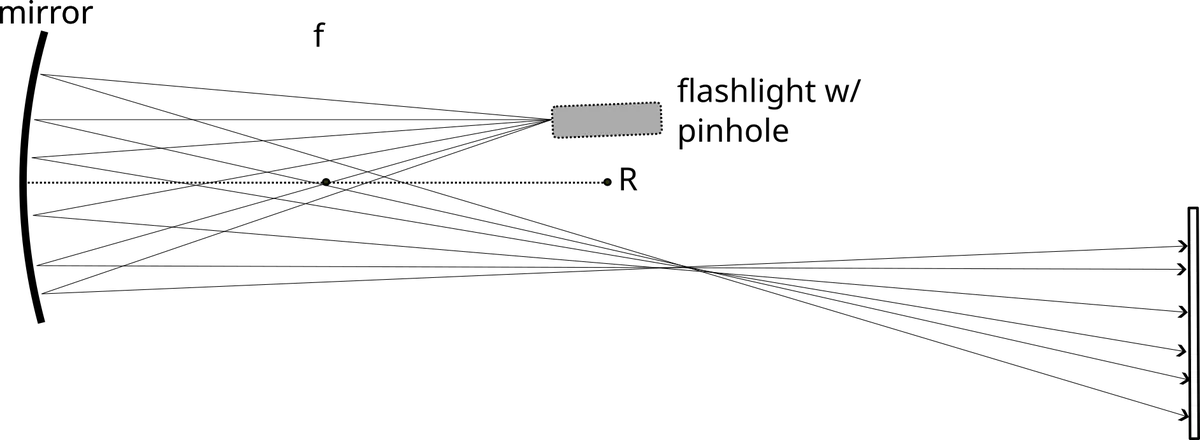
The light rays come back together again, making an image of the pinhole, and then spread back out. When the light rays hit the screen, they are evenly spread out so they illuminate the screen evenly.
Now let's pick out a particular ray. Let's call it A.
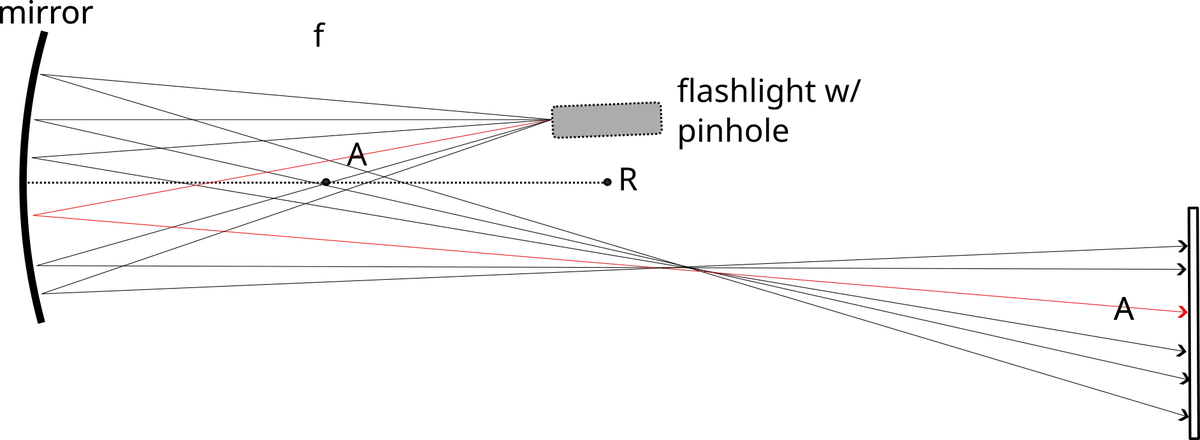
If that ray encounters some air with a different index of refraction (and air with a different temperature has a different index of refraction), then that ray will bend. In fact, if the air with a different index of refraction is near the mirror, the ray will bend twice: once going in on the way to the mirror and again after it bounces off the mirror.
That ray ends up in a new location, making where it was going to go dimmer and making where it ended up going brighter.
